Let’s start from real life! What are the advantages in an Enterprise scenario? We can have multiple teams, with different skills and responsibilities. There are processes to take into account and multiple people have different permissions to access tools, environments and data. Therefore the person in charge of deploying a new tabular model should be able to do it in one single click without even knowing how the model has been developed
And that’s where DevOps comes into play!
Azure DevOps (former VSTS), allows to manage backlog items, work items, task assignments and prioritization, everything via easy to use boards.

Besides it’s possible to maintain, test and deploy every piece of code of your software, from a chatbot to whatever application, even a database or a tabular data model
The concept of DevOps is a best practice that could/should be used in every computer science project.
In this article we will see how to be able to deploy a tabular model in one click without knowing anything of the model (how is done, what it contains, what are the credential to access the datasource…) assuming that the reader already knows:
– AzureDevOps environment
– How to manage projects in Visual Studio
– Git concepts
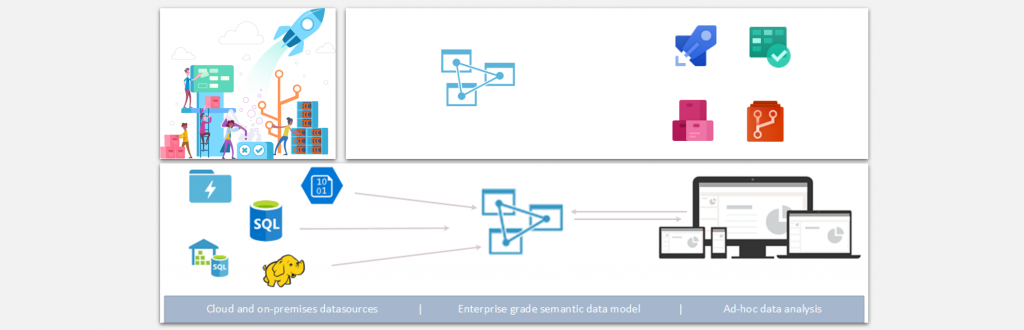
Once you’ve set up you Tabular Model project in visual studio you can sync it on Azure DevOps and you’ll have an organization like what is shown in the picture below:

The .bim file is the core file we need to work with when a new version of the model is developed and needs to be deployed.
If you are a developer you know that you can simply publish a model to the server from Visual Studio, but to make it to work you also need the credentials for the data source and being administrator of the server … probably you won’t have those infos for your customer’s production environment. In general the idea is to modularize the process so that those credentials don’t need to be shared across the organization and the person in charge of doing the deployment won’t need any tools installed on his/her machine.
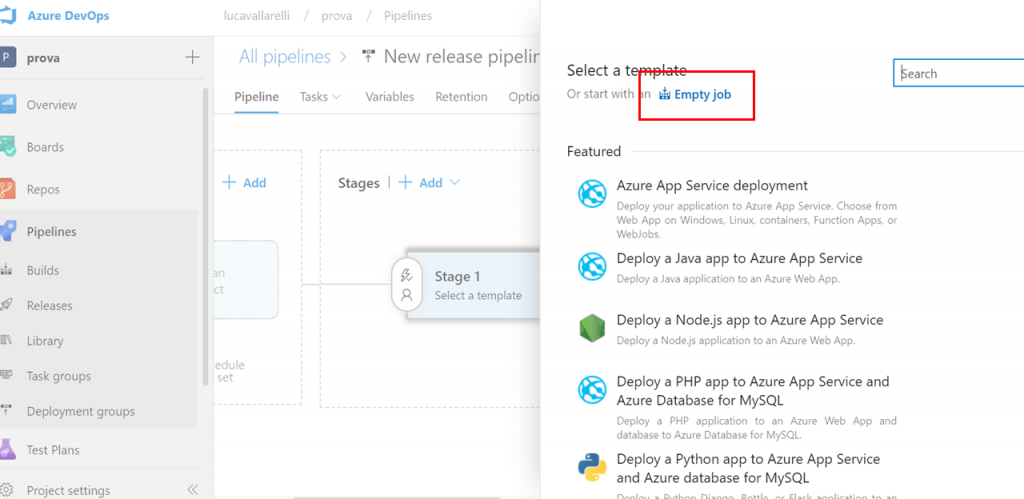
If you don’t have this package install it in the Azure DevOps environment. Once it’s done let’s set up the Release:


We can choose EMPTY JOB here:
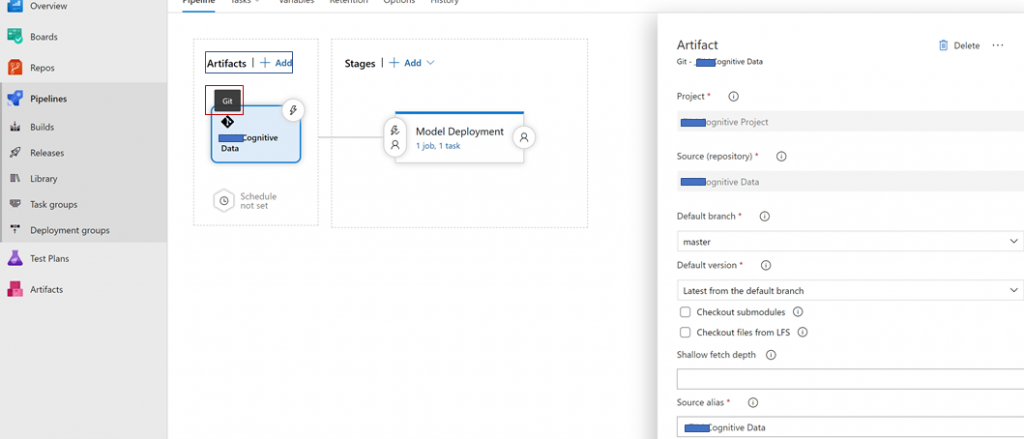
Let’s create a simple artifact based on Git Type where to indicate the repository where our project is. This will allow later to find the path of the .bim file within the job’s task configuration
Click on the link just below the “Stage 1” block (1 job, 0 task):

In the new screen that will appear we need to click on the “+” sign:

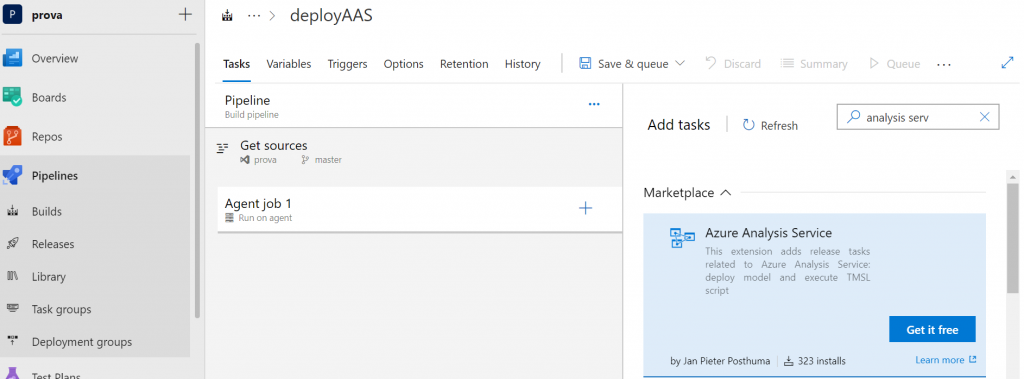
We’ll be asked to choose to add a task, so we type “analysis services” in the search bar as shown below and we select Azure Analysis Services (if you’ve not installed it previously you’ll be asked to install it from the MarketPlace, so click on the “Get it free” blue button)

Otherwise if already installed we’ll see it directly available and it will be possible to add it:
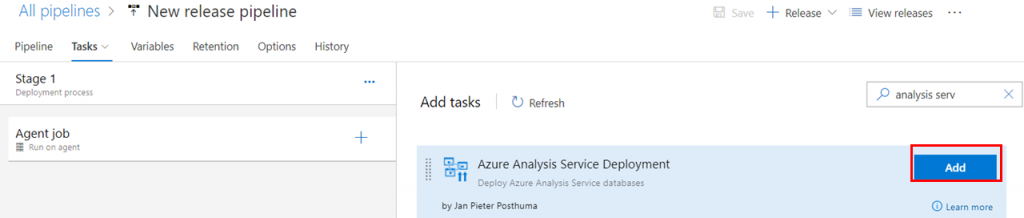
Once added it will show that it needs attention (“Some settings need attention”), don’t worry here, it’s normal. Click on it!

At this point it’s time to add all information of the server and credentials BUT here it’s also possible to put PARAMETERS. In this case we are going to put them and make them secret, but in other cases, with your customer for example, someone else will insert those credentials and we would just use the corresponding parameters.

Let’s first insert them like this:
Analysis Services Admin = $(modelAdmin)
Analysis Services Admin Password = $(modelPassword)
Source User Login = $(dwhadmin)
Source Password = $(dwhpwd)
Data Source Type = Azure SQL
Let’s indicate the path of the famous .bim file:
Model file = $(System.DefaultWorkingDirectory)/……./model.bim
(It is possible to user a service principal as well instead of the “Named User” option: for doing this it’s necessary first to insert the Service Principal as Analysis Services Admin, which cannot be done directly from the portal, but by following this official guide: https://docs.microsoft.com/en-us/azure/analysis-services/analysis-services-addservprinc-admins)
And here is where to set up variables:

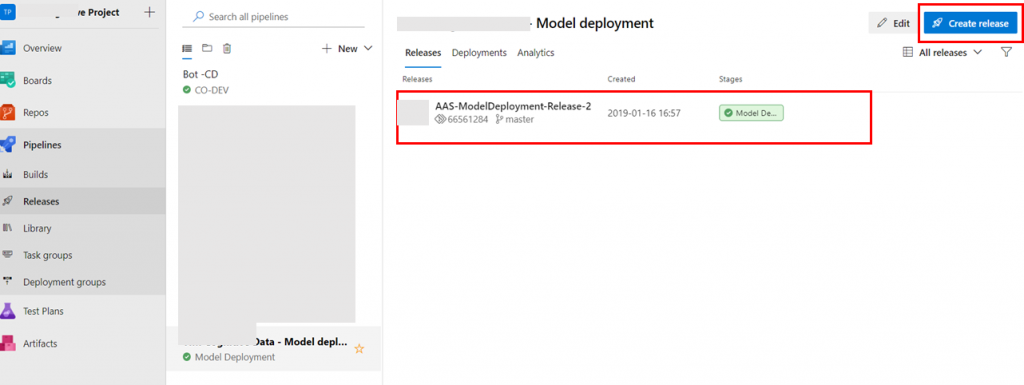
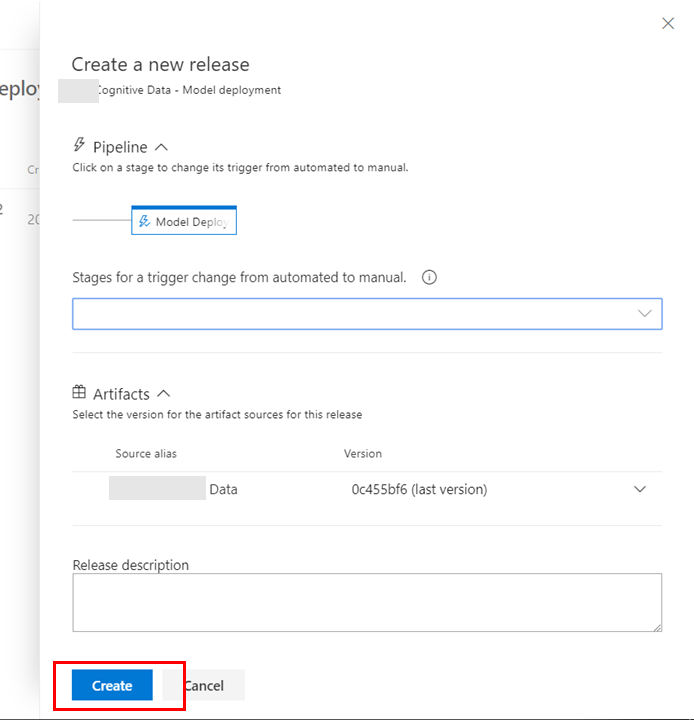
Once that the pipeline is set up for the deployment you can go back to the Releases, selecting this pipeline and click on Create Release
It’s possible to choose to have the stage directly run after creation of the release, or you just create the pipeline and manually start it later ( I personally choose the latter)
At this point you can click on the new release created and then deploy it….in one click as promised !
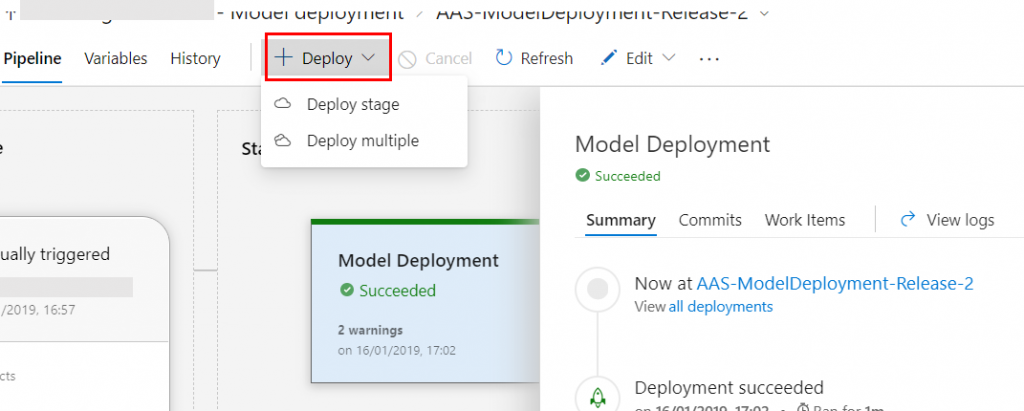
Now for the following deployment it will be enough to upload the new .bim file, create the new release and click on deploy again.
Conclusion
It is possible to deploy Azure Analysis Services model without having admin permission on the server by giving access to the desired user to access DevOps; once the .bim model file is in the folder within DevOps (that is actually the directory containing the AAS project which should contain the solution files) it is now possible to deploy it with a single click.
Advantages:
- Operations: if the IT group of the project has to maintain all the releases of every part of a solution it doesn’t mean it also owns deep technical knowledge of the technologies deployed. That knowledge is of the development team.
- Productivity: in this way the deployment is a simple click, and it’s a package prepared for people in charge of this task.
- Password management: passwords are encrypted and no need to know the data sources’ credentials to be able to do a deployment
- Versioning: the Analysis Services project is not only a model on the server but it’s a project (.smproj) a solution in visual studio, and the .bim file contains the model structure, all its measures, table, M queries and DAX formulas.
…..with respect to Azure Analysis Services here also: Analysis Services, Incremental Refresh, Dynamic Partition: maintainable, scalable, low code. The simple solution you were looking for!
Comments are closed.